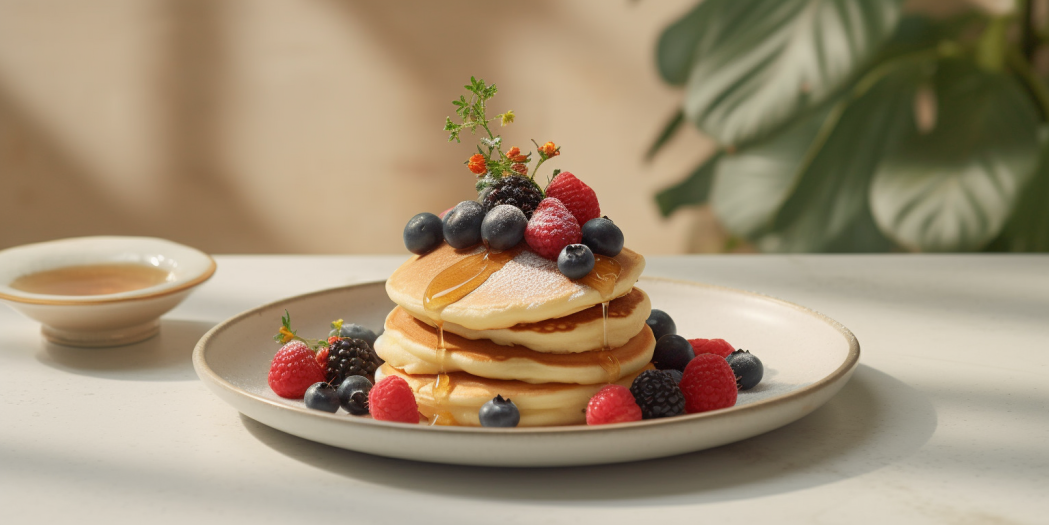
Your Complete Guide to Mastering Pancake Doneness
Creating pancakes can be an exercise of culinary skill as much as a testament to a long-standing tradition in many cultures. But the true beauty lies in their simplicity. This comprehensive guide will delve deeper into the subtleties of crafting pancakes and the reliable signs to know when they are perfectly cooked.
The Pancake Mix: Laying the Groundwork
Preparing the perfect pancakes involves more than just cooking them in a pan. It all starts with the pancake batter, which requires careful mixing and attention to consistency. In this guide, we will explore the key factors to consider when preparing pancake batter, including the mixing process and the desired consistency.
Mixing the Batter
When it comes to mixing pancake batter, it’s crucial to strike the right balance. Overmixing can lead to tough pancakes due to the overdevelopment of gluten. Follow these steps for optimal results:
- Combine Dry and Wet Ingredients: In a mixing bowl, whisk together the dry ingredients (flour, sugar, baking powder, and salt). In a separate bowl, whisk the wet ingredients (milk, eggs, and melted butter or oil);
- Combining the Ingredients: Make a well in the center of the dry ingredients and pour the wet ingredients into it. Gently whisk the mixture until the dry and wet ingredients are just combined. It’s important not to overmix at this stage;
- Lumps in the Batter: Don’t worry if there are a few small lumps remaining in the batter. They will dissolve during cooking, and overmixing to eliminate them may result in tougher pancakes.
Consistency of the Batter
The consistency of pancake batter greatly affects the texture and cooking process. Follow these guidelines to achieve the ideal consistency:
- Thick, Yet Pourable: The batter should be fairly thick but still pourable, similar to the consistency of heavy cream. This thickness ensures that the pancakes will hold their shape when poured onto the pan;
- Minimal Spreading: When you pour the batter onto the pan, it should hold its shape and not spread excessively. This helps maintain the desired thickness and prevents the pancakes from becoming too thin;
- Adjusting Thickness: If the batter is too thin and spreads excessively, try adding a little more flour to thicken it. Conversely, if the batter is too thick and doesn’t spread well, add a small amount of milk to thin it slightly.
Achieving the Perfect Pancake
By considering both the mixing process and the batter’s consistency, you can create pancakes that are fluffy, tender, and cooked to perfection. Here are a few additional tips to keep in mind:
- Resting the Batter: Allow the batter to rest for about 5-10 minutes after mixing. This resting period allows the flour to hydrate fully and results in lighter, fluffier pancakes;
- Preheating the Pan: Preheat the pan or griddle over medium heat before pouring the batter. A properly preheated surface ensures even cooking and prevents sticking;
- Testing the Heat: To check if the pan is ready, flick a few drops of water onto its surface. If the water sizzles and evaporates quickly, it’s time to start cooking the pancakes;
- Portioning the Batter: Use a measuring cup or ladle to portion out the batter onto the pan. This helps maintain consistency in pancake size and ensures even cooking;
- Cooking Time: Cook the pancakes until bubbles form on the surface, then flip them and cook for an additional minute or so until golden brown. Avoid pressing down on the pancakes while cooking, as this can deflate their fluffy texture.
The Pan and the Heat: Setting the Stage
When it comes to cooking pancakes, the choice of pan and the heat level are crucial factors that can greatly impact the final result. In this guide, we will explore the importance of selecting the right pan and maintaining the appropriate heat for achieving evenly cooked and perfectly golden-brown pancakes.
Choosing the Right Pan
Selecting the appropriate pan is essential to ensure even heat distribution and prevent hot spots that can result in unevenly cooked pancakes. Here are a few types of pans that work well for making pancakes:
- Cast-Iron Pan: Cast-iron pans are known for their excellent heat retention and even heat distribution. They provide consistent results and can create beautifully browned pancakes;
- Non-Stick Frying Pan: Non-stick frying pans are popular for cooking pancakes due to their easy food release and even heat distribution. They require less oil or butter for cooking and make flipping pancakes effortless;
- Griddle: A griddle, either stovetop or electric, offers a large cooking surface with consistent heat distribution. Griddles are particularly useful when making multiple pancakes at once.
Setting the Right Heat Level
Maintaining the correct temperature of the pan is crucial for achieving pancakes that are cooked evenly and have a desirable golden-brown color. Consider the following guidelines:
- Medium Heat: Preheat the pan over medium heat before adding the pancake batter. This heat level ensures that the pancakes cook through evenly without the risk of burning;
- Avoid High Heat: Using high heat can cause the outside of the pancake to cook too quickly while leaving the inside undercooked. It may also result in a darker color that is too deep or even burnt;
- Steer Clear of Low Heat: Cooking pancakes on low heat can cause them to spread too much, resulting in thin and floppy pancakes. The pancakes may also take longer to cook, making them more prone to becoming dry or tough.
Achieving the Perfect Pancake Cook
By choosing the right pan and maintaining the appropriate heat level, you can achieve pancakes that are evenly cooked and beautifully golden-brown. Here are a few additional tips to help you in the cooking process:
- Preheating the Pan: Allow the pan to preheat for a few minutes before adding the batter. This ensures that the pan is evenly heated and ready for cooking;
- Testing the Heat: To check if the pan is at the right temperature, you can flick a few drops of water onto its surface. If the water sizzles and evaporates quickly, it indicates that the pan is adequately preheated;
- Greasing the Pan: Lightly grease the pan with butter, oil, or cooking spray before adding the batter. This helps prevent sticking and promotes easy flipping of the pancakes;
- Portioning the Batter: Use a measuring cup or ladle to portion out the batter onto the pan. This helps maintain consistency in pancake size and ensures even cooking;
- Cooking Time: Cook the pancakes until bubbles form on the surface, then flip them and cook for an additional minute or so until they turn golden brown. Adjust the cooking time as needed to achieve the desired level of browning.
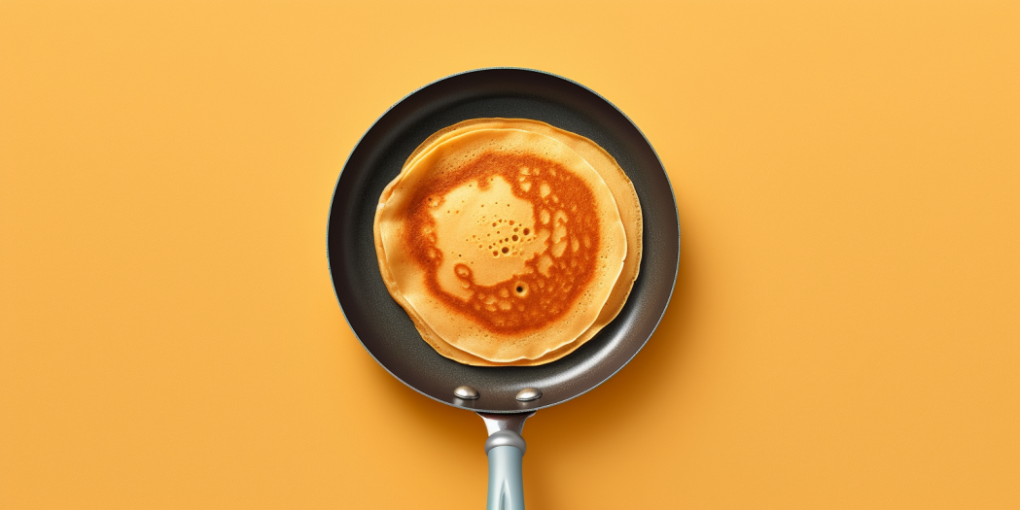
Visual Cues: Deciphering Color and Surface Changes
The most apparent sign that a pancake is cooked is its color.
Table 1: Color Indicators
| Color | Stage | Explanation |
|---|---|---|
| Pale Yellow | Raw | The pancake is still at the early stage of cooking. |
| Golden Brown | Cooked | The pancake has reached the desired color, indicating it’s cooked. |
| Dark Brown | Overcooked | The pancake has been on the pan too long. |
The surface of the pancake also provides cues. One of the reliable signs that it’s time to flip your pancake is when you see bubbles forming and bursting on the top surface, leaving small holes that stay open. This shows that the batter is setting and the bottom of the pancake has likely turned a golden brown.
Physical Cues: The Response to Touch
Physical cues can be an invaluable tool in determining the doneness of your pancakes through the sense of touch. By paying attention to specific tactile sensations, you can gauge whether your pancakes are raw, perfectly cooked, or overcooked.
- Raw Pancake: A raw pancake will feel soft and squishy to the touch. It won’t spring back when gently pressed;
- Perfectly Cooked Pancake: When a pancake is perfectly cooked, it will exhibit a springy response when gently pressed in the center. This indicates that the batter has been thoroughly cooked and has set;
- Overcooked Pancake: An overcooked pancake will feel hard or overly firm when touched. This texture suggests that the pancake has been cooked for too long, resulting in a less desirable outcome.
The Time Test: Timing Your Flips and Lifts
Though the exact cooking time can depend on various factors such as pancake size and pan heat conductivity, a commonly accepted guideline is about 2-3 minutes per side at medium heat.
Table 2: Time Test for Different Pancake Sizes
| Pancake Size | Approximate Cooking Time Per Side |
|---|---|
| Small (3 inches diameter) | 1.5 – 2 minutes |
| Medium (5 inches diameter) | 2 – 3 minutes |
| Large (7 inches diameter) | 3 – 4 minutes |
An important tip to remember is to flip your pancakes only once. Repeated flips can cause the pancakes to deflate and lose their fluffiness.
Pancake Variations: Cooking Different Types of Pancakes
Cooking times and cues can vary based on the type of pancake being cooked. American pancakes are thicker and fluffier, requiring a longer cooking time than their thinner counterparts like the French crêpe or the Swedish pannkakor.
Table 3: Approximate Cooking Times for Different Pancake Types
| Pancake Type | Thickness | Approximate Cooking Time Per Side |
|---|---|---|
| American Pancake | Thick | 2 – 3 minutes |
| French Crêpe | Thin | 1 – 2 minutes |
| Swedish Pannkakor | Thin | 1 – 2 minutes |
Conclusion
Mastering the artistry of pancake creation is a balance of culinary science and sensory expertise. It demands a nuanced understanding of ingredients, the apt use of heat, and the deftness of a single flip. Through this comprehensive guide, we’ve explored the crucial stages of pancake preparation, from the initial mix to the final, golden-brown result, and examined the subtleties that ensure a perfectly fluffy and evenly cooked pancake every time. By understanding the importance of visual, tactile, and temporal cues, anyone can aspire to elevate their pancake making skill. Now that you’re equipped with this detailed knowledge, we hope you’ll embark on a delightful culinary journey.
FAQS
The first pancake serves as a ‘test run’ for your pan’s heat level. By the second pancake, you’ll have a better gauge of the right temperature.
Consistency is key. Use a ladle or a measuring cup to ensure each pancake is made with the same amount of batter.
Yes, though uncommon, it’s possible to use a digital cooking thermometer. The internal temperature should reach 200°F (93°C) when fully cooked.
This could be due to several reasons: overmixing the batter, using old baking powder, or having too much liquid in your batter.
Keep them in a preheated oven at 200°F (93°C) in a single layer on a baking sheet. This keeps them warm and retains their fluffiness.